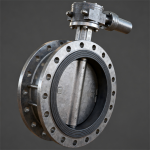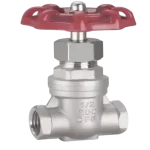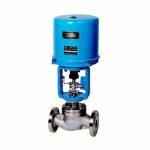
Quick Summary: A gate valve that will not close fully is usually caused by debris in the seat area, seat or wedge damage, stem thread wear, excessive closing torque, actuator travel error, corrosion, scale buildup, external stem or yoke obstruction, or pipe stress affecting valve alignment. The correct response is not to force the handwheel or actuator. Operators should confirm valve travel, flow condition, stem movement, actuator settings, leakage symptoms and service media before planning flushing, adjustment, internal inspection, repair or replacement. Gate valves are mainly designed for full-open or full-closed isolation service, not continuous throttling.
A gate valve that does not close fully can cause seat leakage, pressure loss, process interruption and unreliable isolation. The problem may be external, such as an actuator travel limit error, or internal, such as debris, corrosion or seat damage. Good troubleshooting starts by identifying where the valve stops, how it leaks and whether the operator, stem, wedge and seat are all moving correctly.
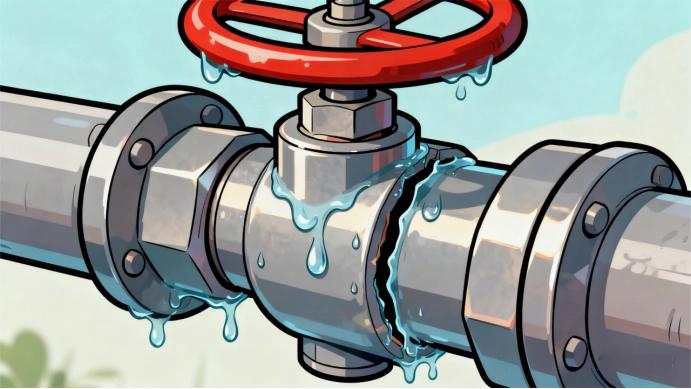
Quick Diagnosis: Why a Gate Valve Will Not Close Fully
| Symptom | Likely Cause | First Check | Safe Action |
|---|---|---|---|
| Flow continues after closing | Debris, damaged seat or wedge not seated | Compare stem travel and leakage pattern | Do not force; plan flushing or inspection |
| Handwheel stops early | Stem thread wear, obstruction or packing gland issue | Check stem movement, gland, yoke and gearbox | Inspect external operator before internal disassembly |
| Actuator shows closed but leakage continues | Limit switch error, torque setting or wedge/seat issue | Verify travel limit and position feedback | Recalibrate actuator and test full valve travel |
| High torque near closed position | Debris, corrosion, scale or pipe stress | Review torque trend and service condition | Stop forcing; inspect during shutdown |
| Repeated leakage after cleaning | Seat damage, wedge damage or corrosion | Inspect seat, wedge and body condition | Repair parts or replace valve if sealing cannot be restored |
How a Gate Valve Closes
A gate valve closes by moving a wedge or gate into the flow path. In a properly operating valve, the wedge reaches the seat surfaces and provides isolation. Gate valves are mainly designed for fully open or fully closed service. They should not be used for continuous throttling because partial opening can damage the seat and wedge surfaces.
If the handwheel, gearbox or actuator indicates closed but the wedge has not fully seated, leakage may continue. Troubleshooting should therefore check both external operation and internal sealing condition, not just the operator position.
For a closer look at how the stem, wedge and seat work together, read our gate valve types, parts and working principle guide. Understanding these components helps distinguish a travel problem from a sealing problem.
Common Signs a Gate Valve Is Not Closing Fully
- Flow continues after the valve is closed.
- Downstream pressure does not drop as expected.
- The handwheel stops before the normal travel position.
- Actuator torque rises sharply near the closed position.
- The stem position indicator does not match actual valve travel.
- Leakage appears across the seat after closing.
- The valve becomes difficult to operate after corrosion, scaling or shutdown.
Main Causes and How to Fix Them
1. Debris Trapped in the Seat
Symptom: The valve reaches the closed position, but flow still passes through or leakage appears immediately after closure.
Possible cause: Sand, welding slag, rust, scale or process solids may settle at the bottom of the valve body and prevent the wedge from seating.
Recommended check: Compare leakage behavior before and after gentle operation, check commissioning cleanliness and review whether solids are present in the line.
Fix / corrective action: Flush the line if safe, operate the valve carefully, and inspect the seat area during shutdown. If debris is frequent, review upstream filtration and line cleaning procedures.
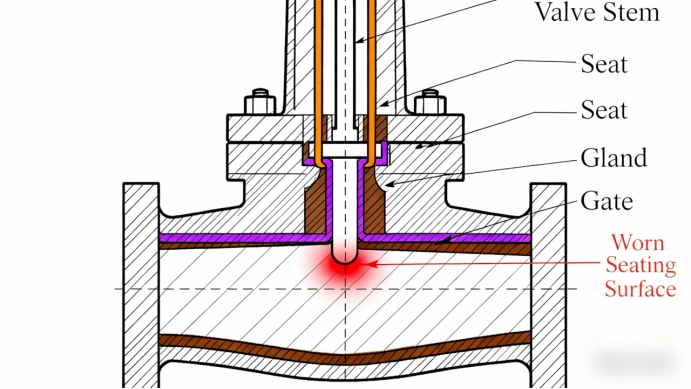
2. Damaged Seat Surface
Symptom: The valve closes through its normal travel, but leakage remains even after cleaning or repeated operation.
Possible cause: The seat may be scratched, eroded, corroded or scored by hard particles. Throttling service can also accelerate seat wear.
Recommended check: Inspect the seat surface, leakage path and service media. Look for erosion, pitting, scratches or loss of seating contact.
Fix / corrective action: Minor damage may be lapped or repaired if the valve design allows. Severe seat damage normally requires seat parts, trim repair or valve replacement.
3. Wedge Damage or Misalignment
Symptom: The stem travels, but the valve does not seal evenly or the closing feel changes near the end of travel.
Possible cause: The wedge may be worn, corroded, guided poorly or misaligned with the seat. A flexible wedge can tolerate some temperature movement, but it cannot overcome severe damage or foreign material.
Recommended check: During maintenance, check wedge faces, guide surfaces, stem connection and whether the wedge seats symmetrically.
Fix / corrective action: Repair or replace the wedge, guides or seat parts as needed. Do not compensate for wedge misalignment by simply applying more closing torque.
4. Stem Thread Wear
Symptom: The handwheel turns, but the valve travel is reduced, inconsistent or rough.
Possible cause: Worn stem threads, damaged yoke nut, poor lubrication or thread contamination can prevent handwheel movement from translating into full wedge travel.
Recommended check: Inspect stem threads, yoke nut condition, lubrication, rising stem movement and travel compared with the valve’s normal open-close distance.
Fix / corrective action: Clean and lubricate the stem if appropriate. Replace worn stem or yoke nut parts when travel cannot be restored reliably.
5. Excessive Closing Torque
Symptom: The valve becomes harder to close, or operators keep applying more force to stop leakage.
Possible cause: Excessive torque can deform or damage the stem, wedge, seat, yoke nut or actuator gearbox. If hard debris is trapped, forcing the valve may press it into the seat surface.
Recommended check: Review operating torque, handwheel effort, actuator torque switch settings and whether the problem started after forced operation.
Fix / corrective action: Stop forcing the valve. Identify whether the issue is debris, mechanical obstruction, corrosion, seat damage or actuator setting before adjusting torque limits.
6. Actuator Travel Limit Error
Symptom: The actuator display says closed, but leakage continues or the stem travel is shorter than expected.
Possible cause: Electric, pneumatic or gearbox-operated valves may stop early if limit switches, torque switches or position feedback are set incorrectly.
Recommended check: Verify open and close limits, torque setting, local position indicator and actual stem movement. For automated valves, review actuator sizing and control logic with the valve actuator selection guide.
Fix / corrective action: Recalibrate travel limits and test full stroke under controlled conditions. Replace actuator components only if mechanical failure is confirmed.
7. Scale or Corrosion Buildup
Symptom: The valve becomes stiff, closes slowly or leaks after long service in water, steam, chemical or outdoor pipelines.
Possible cause: Rust, scale, deposits or corrosion products can restrict wedge movement and damage sealing surfaces.
Recommended check: Review media chemistry, temperature, corrosion history, drainage condition and internal deposits during shutdown.
Fix / corrective action: Clean internal parts where practical and check whether body, trim and seat materials match the service. For replacement material decisions, use a valve material selection guide before selecting the next valve.
When reviewing actuator output or closing settings, refer to our valve stem thrust calculation guide to understand the loads involved. Any adjustment should remain within the valve and actuator manufacturer’s approved limits.
8. Packing Gland, Stem or Yoke Obstruction
Symptom: The valve stops before full travel, or the operator feels mechanical resistance outside the pressure boundary.
Possible cause: An over-tightened packing gland, damaged stem cover, bent stem, yoke damage, yoke nut issue, gearbox resistance or external obstruction may prevent full travel.
Recommended check: Inspect the packing gland, stem straightness, handwheel, gearbox, yoke, stem cover and any nearby mechanical interference before opening the valve body.
Fix / corrective action: Correct external obstruction, adjust packing only within maintenance limits, repair damaged stem or yoke parts, and retest travel before assuming seat failure.
9. Pipe Stress or Valve Body Distortion
Symptom: A large gate valve is difficult to close after installation, thermal cycling or piping modification.
Possible cause: Poor flange alignment, excessive pipe load, thermal expansion or body distortion may affect wedge movement and seating. This is especially important for larger flanged or high-temperature gate valves.
Recommended check: Check flange alignment, pipe support, bolt load, thermal movement and whether the valve body is carrying pipe stress.
Fix / corrective action: Correct piping support and alignment before replacing internal parts. If body or seat distortion is confirmed, valve replacement may be required.
Why You Should Not Force a Gate Valve Closed
Forcing a gate valve closed can turn a repairable problem into a more expensive failure. Excessive torque may damage stem threads, the yoke nut, wedge, seat surfaces or actuator gearbox. If hard debris is trapped in the seat, more force can embed that debris into the sealing surface instead of solving the leakage.
For actuated valves, the torque switch should not simply be increased without checking the cause. Safe troubleshooting should identify whether the problem is debris, travel error, mechanical obstruction, corrosion, pipe stress or seat damage. A gate valve should close firmly, but abnormal resistance is a signal to investigate.
Step-by-Step Troubleshooting Process
Step 1: Confirm the Valve Is Suitable for Isolation
Check whether the valve has been used for throttling or frequent flow control. Gate valves are not intended for continuous throttling, and seat damage may follow if they are operated partly open for long periods.
Step 2: Check Operator Travel
Compare handwheel turns, stem position or actuator stroke with the expected travel. Actuator indication alone does not prove the wedge is fully seated.
For practical checks using stem movement, handwheel operation and position indicators, see our guide on how to tell if a valve is open or closed. A closed indication alone does not confirm leak-tight isolation.
Step 3: Inspect External Components
Before planning internal disassembly, check the packing gland, stem, yoke, gearbox, actuator, travel stops and nearby obstruction.
Step 4: Flush the Line If Safe
If debris is suspected and the system allows it, flushing may clear loose solids. Do not flush in a way that creates a safety or contamination risk.
Step 5: Plan Internal Inspection
If leakage remains, inspect the seat, wedge, guides, body cavity and stem connection during shutdown. Similar failure logic is covered in common valve failures in chemical pipelines.
Repair, Adjust or Replace?
| Problem Found | Possible Action | When Replacement Should Be Considered |
|---|---|---|
| Debris on seat | Clean, flush and inspect seat area | Replace only if seat damage remains after cleaning |
| Minor seat wear | Lap or repair if the valve design allows | Replace if sealing cannot be restored |
| Severe seat or wedge damage | Repair parts if available | Replace if damage is extensive or parts are unavailable |
| Stem or yoke nut wear | Replace stem, yoke nut or operator parts | Replace valve if parts are unavailable or body damage exists |
| Actuator limit error | Recalibrate limit and torque switches | Replace actuator only if mechanical failure exists |
| Corrosion or material mismatch | Change body, trim or seat material for the service | Replace valve if corrosion repeats or body integrity is affected |
| Pipe stress or body distortion | Correct piping support and alignment | Replace if valve body or seats are distorted |
Gate Valve Type and Service Media Matter
Solid wedge, flexible wedge, resilient seated and knife gate designs respond differently to debris, temperature movement and solids. For slurry service, a conventional wedge gate valve may not be the best choice; a knife gate or slurry-service design may be more suitable depending on pressure, solids and shutoff requirement. For that specific application, compare the knife gate valve guide instead of treating all gate valves as interchangeable.
Service media also changes the failure pattern. Water with sand can score seats; steam can create thermal expansion and seat wear; corrosive liquids can damage the body, trim or stem; slurry can jam the wedge area. These conditions should be part of troubleshooting and replacement selection.
If replacement is needed for conventional pipeline isolation, review our Wedge Gate Valve for configuration options. Confirm wedge design, seat material, pressure class and service compatibility before selecting a replacement.
What to Confirm Before Replacing a Gate Valve
For replacement or project procurement, buyers should provide enough detail so the supplier can evaluate a suitable gate valve configuration. Useful RFQ information includes:
- Valve size and pressure class
- End connection: flanged, butt weld, socket weld or threaded
- Body material and trim material
- Wedge type: solid wedge, flexible wedge, resilient seated or knife gate for slurry service
- Seat material and required leakage performance
- Stem type: rising stem or non-rising stem
- Operation: handwheel, gearbox, electric actuator or pneumatic actuator
- Service media, temperature and pressure
- Installation direction and pipe layout
- Applicable standards such as API 600, API 602, API 6D, ASME B16.34 or relevant EN standards
- Pressure test and material certificate requirements
Before ordering a replacement, use our valve end connection types guide to identify the required connection. Confirm the applicable connection standard, pressure rating and matching dimensions against the existing piping specification.
For new procurement, review Vcore Valve’s industrial gate valve product range, then provide the operating details above. If the existing valve cannot be repaired reliably, you can also send the service condition and failure description through the contact page for RFQ review.
Final Recommendations
When a gate valve will not close fully, do not assume that more force will solve the problem. First confirm travel, operator condition, actuator setting, external obstruction and service media. Then evaluate whether the leakage comes from debris, seat damage, wedge misalignment, corrosion, pipe stress or material mismatch. The right action may be cleaning, adjustment, repair, actuator recalibration, piping correction or valve replacement.
FAQ
Why won’t my gate valve close fully?
A gate valve may not close fully because of debris in the seat, damaged seat surfaces, wedge misalignment, stem wear, actuator travel error, corrosion, external obstruction or pipe stress.
Can I force a gate valve closed?
No. Forcing the valve can damage the stem threads, yoke nut, wedge, seat surfaces or actuator gearbox. The cause of abnormal resistance should be checked first.
What causes a gate valve to leak after closing?
Leakage after closing may be caused by seat damage, trapped debris, wedge damage, actuator setting error, insufficient stem travel or corrosion on the sealing surfaces.
Can debris stop a gate valve from closing?
Yes. Sand, welding slag, rust, scale or process solids can collect in the body cavity and prevent the wedge from seating fully.
How do I know if the actuator is the problem?
Check whether the actuator reaches full stroke, whether limit switches and torque switches are set correctly, and whether the stem travel matches the closed indication.
Should a gate valve be repaired or replaced?
It depends on the damage. Debris or minor wear may be repairable, while severe seat damage, body distortion, repeated corrosion or unavailable spare parts may require replacement.
What information should I provide when replacing a gate valve?
Provide size, pressure class, end connection, material, wedge type, seat material, stem type, operation method, media, temperature, pressure, leakage requirement and applicable standards.